The Complete Mushroom Growing Guide
From substrate preparation to harvest — everything Canadian growers need to know about commercial mushroom cultivation.
Canada’s commercial mushroom industry is booming. With domestic demand for specialty mushrooms outpacing supply and Canadians increasingly seeking locally grown, sustainable food, there has never been a better time to start a commercial mushroom growing operation. Whether you’re a farmer looking to diversify, an entrepreneur exploring high-value crops, or a hobbyist ready to scale up, this guide covers everything you need to know about growing mushrooms commercially in Canada — from choosing your first species and sourcing quality spawn to harvesting, selling, and building a profitable business.
At Boreal Genetics, we’ve helped hundreds of Canadian growers — from basement startups in Ontario to large-scale operations in British Columbia — launch and scale their mushroom farms. This guide distills our experience into a practical, step-by-step resource tailored specifically to the Canadian climate, regulations, and market.
1. The Canadian Commercial Mushroom Opportunity
Canada imports millions of dollars worth of specialty mushrooms each year, primarily from China, South Korea, and the United States. Meanwhile, Canadian consumers are paying premium prices — $18–$30/lb for lion’s mane, $14–$22/lb for oyster mushrooms, and $20–$35/lb for shiitake at farmers’ markets and specialty grocery stores. This gap between demand and domestic supply represents a massive opportunity for Canadian growers.
Several factors make commercial mushroom growing particularly attractive in Canada right now:
- Growing consumer demand: The Canadian specialty mushroom market has seen double-digit growth year over year, driven by interest in plant-based diets, functional foods, and locally sourced produce.
- Import replacement: Restaurants and grocery chains increasingly want to source domestically. Fresh, locally grown mushrooms have a significant quality advantage over imported product that has spent days in transit.
- Year-round production: Unlike field crops, mushrooms are grown indoors. A properly insulated and climate-controlled growing room produces consistent harvests 365 days a year — a major advantage in a country with long winters.
- High value per square foot: A single 10′ × 20′ growing room can produce $50,000–$100,000+ worth of mushrooms annually, making it one of the highest-value crops per square foot available to Canadian farmers.
- Low startup costs (relatively): Compared to other agricultural ventures, a small commercial mushroom operation can be launched for $15,000–$50,000 CAD, with the potential to break even within the first year.
- Sustainability story: Mushrooms can be grown on agricultural waste products (straw, sawdust, coffee grounds), use minimal water compared to traditional crops, and produce virtually zero waste — the spent substrate makes excellent compost.
Provinces like British Columbia, Ontario, Quebec, and Alberta have particularly strong markets for specialty mushrooms, but demand exists across the country. Even in smaller markets like the Maritime provinces or the Prairies, growers are finding eager customers among chefs, health food stores, and direct-to-consumer channels.
2. Choosing Your Species
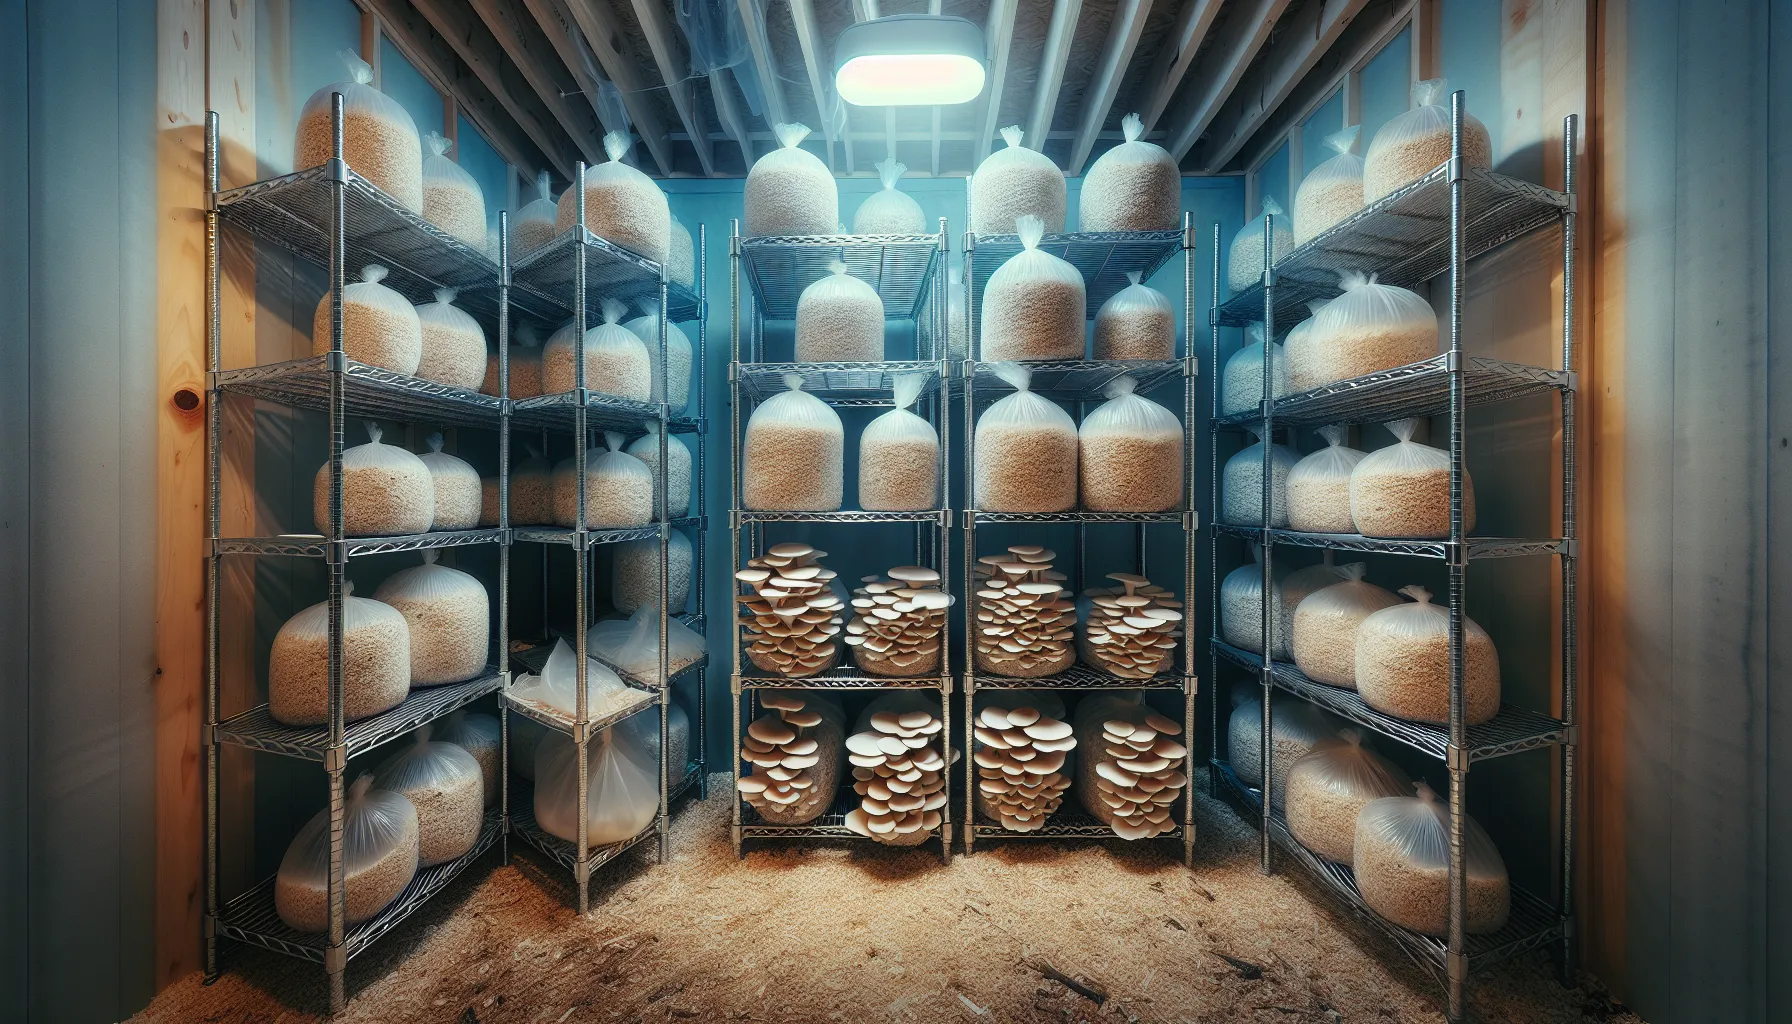
The species you choose to grow will determine nearly everything about your operation — your substrate, growing conditions, equipment needs, target market, and profitability. For a deep dive into every commercially viable species, including growing parameters, market analysis, and strain selection, see our comprehensive Guide to Mushroom Species for Canadian Growers.
Here’s a quick overview of the top species for Canadian commercial growers:
Blue Oyster (Pleurotus ostreatus var. columbinus)
The best species for beginners. Blue oyster is extremely forgiving, grows on a wide range of substrates, colonizes aggressively (which helps resist contamination), and fruits reliably. It’s a strong seller at farmers’ markets and restaurants. Our Dusk Blue Oyster strain is specifically selected for Canadian growing conditions, producing dense clusters with excellent shelf life even at cooler fruiting temperatures of 10–18°C.
Lion’s Mane (Hericium erinaceus)
The highest-value gourmet mushroom you can grow, commonly selling for $22–$30/lb retail. Lion’s mane has exploded in popularity due to its remarkable flavour (often compared to lobster or crab) and well-researched cognitive health benefits. It requires slightly more attention to humidity and fresh air exchange than oysters but is very manageable. Our Snowflake Lion’s Mane strain produces large, dense, snow-white fruiting bodies with exceptional texture.
Shiitake (Lentinula edodes)
The world’s second most cultivated mushroom and a staple in Canadian kitchens. Shiitake commands strong prices ($18–$28/lb) and has an exceptionally loyal customer base. Indoor cultivation on supplemented sawdust blocks produces consistent, high-quality results year-round. Our Ember Shiitake strain delivers excellent yields with thick caps and rich flavour, and is well-suited to the supplemented hardwood substrates available across Canada.
Other Species to Consider
As your operation matures, consider adding king oyster (excellent for restaurant sales), maitake/hen of the woods (high value, strong demand), chestnut mushrooms (beautiful appearance, nutty flavour), or pioppino (increasingly popular with chefs). Each species adds complexity to your operation but also diversifies your product line and revenue streams. Visit our species guide for detailed growing parameters for each.
3. Understanding Mushroom Spawn
Spawn is to mushroom farming what seed is to traditional agriculture — it’s the living culture used to inoculate your substrate. The quality of your spawn directly determines your yields, contamination rates, and overall success. Understanding the different types of spawn and how to choose a reliable supplier is one of the most important decisions you’ll make.
What Is Spawn?
Mushroom spawn consists of a carrier material (usually cereal grain) that has been fully colonized by mushroom mycelium — the vegetative, root-like network of the fungus. When mixed into a prepared substrate, the mycelium grows outward from each grain kernel, colonizing the new material and eventually producing mushrooms. Think of each grain kernel as a tiny launchpad for mycelial growth.
Types of Spawn and Culture
Grain Spawn is the industry standard for commercial production. Sterilized cereal grain (typically rye, wheat, or millet) is inoculated with mushroom culture and allowed to fully colonize. Grain spawn offers the highest inoculation rate because each individual kernel acts as a separate inoculation point. A single 2.5 kg bag of grain spawn can inoculate 10–25 substrate bags depending on species and desired colonization speed. For commercial growers, grain spawn is the clear choice for efficiency and reliability.
Liquid Culture is a suspension of live mycelium in a sterile nutrient broth. It’s primarily used by growers who want to produce their own grain spawn in-house. A single syringe of liquid culture can inoculate multiple jars or bags of grain, making it cost-effective for larger operations that have the sterile technique and equipment to produce their own spawn. However, liquid culture requires more skill to work with and carries higher contamination risk for inexperienced growers.
Agar Slants and Plates are used for long-term culture storage and strain development. These are primarily of interest to advanced cultivators and spawn producers. Agar work allows you to isolate desirable genetics, test for contamination, and maintain a culture library — but it requires a laminar flow hood, sterile technique, and significant experience.
Choosing a Spawn Supplier
Your spawn supplier is arguably your most important business partner. Here’s what to look for:
- Canadian-based production: Spawn shipped internationally faces delays at customs, temperature extremes during transit, and potential regulatory issues. A Canadian supplier means faster shipping, no border delays, and spawn that’s adapted to Canadian growing conditions.
- Genetic quality: Not all strains are created equal. Look for a supplier that maintains clean genetics, performs regular transfers to prevent senescence (genetic degradation), and selects strains specifically for commercial traits like yield, speed, and contamination resistance.
- Freshness: Grain spawn is a living product. It should arrive fully colonized but not overgrown (no thick ropey mycelium or excessive metabolites). Fresh spawn colonizes faster and performs better.
- Technical support: Especially when starting out, having a supplier who can answer your questions about inoculation rates, substrate recipes, and troubleshooting is invaluable.
- Consistency: Commercial growing demands predictable results. Your supplier should deliver consistent genetics and quality batch after batch.
At Boreal Genetics, we produce all of our grain spawn in-house at our Canadian facility using proprietary strains selected specifically for performance in Canadian growing conditions. Every batch is tested for vigour and purity before shipping. For commercial operations, we offer bulk pricing and scheduled production runs through our commercial program.
4. Substrate Preparation

Substrate is the material your mushrooms actually grow on — it provides the nutrition, moisture, and structure the mycelium needs to colonize and fruit. Getting your substrate preparation right is critical: too wet and you’ll get bacterial contamination; too dry and colonization stalls; improperly treated and competitor moulds will overtake your crop.
Common Substrates for Commercial Production
Hardwood Sawdust is the base material for most commercial mushroom production in Canada. It’s readily available from sawmills and woodworking shops across the country. The best species for mushroom substrate are sugar maple, red oak, American beech, and yellow birch — all abundant in Eastern Canada. Western growers can use red alder and bigleaf maple with excellent results. Avoid softwoods (spruce, pine, cedar) as their resins and terpenes inhibit mycelial growth.
Straw (wheat, oat, or barley) is the traditional substrate for oyster mushrooms. It’s inexpensive, widely available from Canadian grain farmers, and requires only pasteurization rather than full sterilization. Chopped to 2–5 cm lengths and pasteurized, straw produces excellent oyster mushroom yields at very low cost. Many Canadian growers source straw directly from neighbouring farms at $4–$8 per bale.
Supplemented Sawdust (Masters Mix) is the gold standard for commercial production of most gourmet species. The classic recipe is 50% hardwood sawdust and 50% soy hull pellets by dry weight, hydrated to 60–65% moisture content. This blend provides an ideal carbon-to-nitrogen ratio that dramatically increases yields — often 50–100% more than sawdust alone. Soy hull pellets (also called soymeal pellets) are available from agricultural suppliers across Canada, typically at $20–$35 per 25 kg bag.
Pasteurization vs. Sterilization
Pasteurization involves heating the substrate to 65–82°C for 1–2 hours. This kills most harmful organisms while leaving beneficial microbes alive — these “friendly” bacteria actually help protect against contamination. Pasteurization is typically used for straw-based substrates and is the simpler, lower-cost approach. Methods include hot water bath (submerging chopped straw in 74°C water for 60 minutes), cold water lime bath (soaking in hydrated lime solution for 16–18 hours), or steam pasteurization in an insulated container.
Sterilization involves heating substrate to 121°C at 15 PSI for 2–3 hours in a pressure vessel (autoclave). This kills all living organisms, creating a completely blank slate. Sterilization is required for supplemented substrates like masters mix because the added nutrition (soy hulls) would feed competitor moulds if they weren’t completely eliminated. Most commercial operations use large autoclaves or sterilization tunnels. A quality used autoclave suitable for small commercial production runs $3,000–$8,000 CAD.
Canadian Wood Species Guide
| Wood Species | Region | Best For | Notes |
|---|---|---|---|
| Sugar Maple | ON, QC, NB, NS | Shiitake, Lion’s Mane, Maitake | Excellent all-around substrate wood. The gold standard. |
| Red Oak | ON, QC | Shiitake, Lion’s Mane | Dense hardwood, slightly slower colonization but excellent yields. |
| Yellow Birch | ON, QC, NB, NS, MB | Oyster, Shiitake, Lion’s Mane | Widely available and performs well for most species. |
| White Birch | All provinces | Oyster, Chestnut | Abundant across Canada. Good but less nutritious than yellow birch. |
| American Beech | ON, QC, NB, NS | Shiitake, Maitake, Nameko | Excellent nutrition profile. Traditional substrate in Japan. |
| Red Alder | BC | Oyster, Shiitake, Lion’s Mane | The best substrate wood for West Coast growers. |
| Bigleaf Maple | BC | All gourmet species | Excellent Western Canada alternative to sugar maple. |
| Trembling Aspen | All provinces | Oyster | Works in a pinch but lower yields. Very widely available. |
Pro tip: Contact your local sawmill and ask for hardwood sawdust — many will give it away for free or charge a nominal fee. Ensure the sawdust is from untreated wood (no pressure-treated, painted, or chemically processed lumber) and is free of softwood contamination. If possible, get sawdust from a single species rather than a mix, as this gives you more consistent results.
5. Growing Environment Setup

Your growing environment is the single largest factor determining your success. Mushrooms are far more sensitive to environmental conditions than most crops — small deviations in humidity, CO₂ levels, or temperature can dramatically affect yields, quality, and contamination rates. Investing in a properly designed growing room pays for itself many times over.
Growing Room Requirements
A commercial growing room doesn’t need to be fancy, but it does need to provide precise environmental control. Many successful Canadian operations start in converted shipping containers, insulated garden sheds, spare rooms, or sections of existing farm buildings. The key requirements are:
- Insulation: Critical for Canadian operations. A minimum of R-20 wall insulation and R-30 ceiling insulation is recommended. Spray foam insulation is ideal because it creates both an insulation and vapour barrier. Proper insulation keeps heating costs manageable during -30°C winters and helps maintain stable temperatures year-round.
- Vapour barrier: Mushroom growing rooms operate at 85–95% relative humidity. Without a proper vapour barrier, moisture will migrate into walls and insulation, causing mould, rot, and structural damage. Use 6-mil poly sheeting or closed-cell spray foam on all walls and ceiling.
- Washable surfaces: All interior surfaces should be smooth, non-porous, and easy to clean. FRP (fibreglass reinforced plastic) panels, painted concrete, or poly-lined walls are common choices. Avoid exposed wood, drywall, or any surface that can harbour contaminants.
- Drainage: Growing rooms get wet. Floor drains or a sloped floor to a drain point is essential. Sealed concrete or epoxy-coated floors work well.
- Size: A typical starter commercial room is 10′ × 20′ (200 sq ft), which can accommodate 200–400 fruiting blocks on shelving and produce 50–100+ lbs of mushrooms per week depending on species.
HVAC and Climate Control
Precise temperature control is essential. Most gourmet mushroom species fruit between 10–21°C, with specific ranges varying by species. You’ll need both heating (for Canadian winters) and cooling (for summer months or species that fruit at lower temperatures).
Heating: Electric heaters, hydronic radiant floor heating, or forced-air furnaces all work. Electric is simplest for small operations. For heating during Canadian winters, budget $200–$600/month in electricity for a 200 sq ft growing room, depending on your province’s electricity rates and insulation quality. Heat pumps (mini-splits) are increasingly popular as they provide both heating and cooling with excellent energy efficiency — even at -25°C, modern cold-climate mini-splits like the Mitsubishi Hyper-Heat maintain good performance.
Cooling: A standard mini-split air conditioner (12,000–18,000 BTU for a 200 sq ft room) handles summer cooling and provides precise temperature control year-round. Budget $1,500–$3,500 CAD installed for a quality unit.
Humidity Control
Maintaining 85–95% relative humidity (RH) is non-negotiable for mushroom fruiting. Below 80% RH, primordia (baby mushrooms) dry out and abort. Above 98% RH, you risk bacterial blotch and poor air quality.
For commercial operations, ultrasonic humidifiers or high-pressure fogging systems are the standard. Ultrasonic disc humidifiers (like the House of Hydro units) are affordable ($200–$500 CAD) and effective for rooms up to 500 sq ft. High-pressure fog systems ($1,500–$5,000 CAD) are better for larger operations as they provide finer mist and more even coverage.
Connect your humidifier to a humidity controller (Inkbird or similar, $40–$80 CAD) set to maintain your target RH. Use a quality digital hygrometer to verify readings — cheap analog hygrometers can be off by 10–15%.
Fresh Air Exchange (FAE)
Mushrooms consume oxygen and produce CO₂, just like animals. In an enclosed growing room, CO₂ levels can quickly climb above 2,000–5,000 ppm, causing elongated stems, small caps, and poor quality. Proper fresh air exchange keeps CO₂ below 800–1,000 ppm during fruiting (though some species tolerate higher levels).
A simple FAE setup uses an inline fan (4–6 inch) on a timer, pulling fresh air from outside through a HEPA or MERV-13+ filter and exhausting stale air. Run the fan 5–15 minutes per hour or use a CO₂ controller ($150–$400 CAD) for automated management. In Canadian winters, incoming air will be very cold and dry — you may need to pre-heat incoming air with an inline duct heater to avoid shocking your mushrooms with blasts of -20°C air.
Lighting
Mushrooms don’t photosynthesize, but most species need some light as a directional cue for fruiting body formation. A simple 6500K LED shop light providing 500–1,000 lux for 12 hours per day is sufficient. This is one of the least expensive components of your setup — a $30 LED fixture is all you need for a 200 sq ft room.
Canadian Winter Considerations
Growing mushrooms year-round in a country where winter temperatures routinely hit -20°C to -40°C presents unique challenges that growers in milder climates don’t face:
- Insulate aggressively: R-24 or higher in walls, R-40 in ceilings. The investment in insulation pays for itself in reduced heating costs within the first season.
- Seal all air leaks: Cold drafts don’t just waste energy — they create microclimates that stress mushrooms and invite contamination.
- Pre-heat incoming fresh air: Use an inline duct heater or heat recovery ventilator (HRV) to temper incoming winter air before it hits your crop.
- Monitor humidity closely in winter: Cold outside air is extremely dry. When you bring -25°C air into a warm growing room, its relative humidity drops to near zero. Your humidification system will work much harder in winter — ensure it has adequate capacity.
- Backup heating: A power outage in January can freeze your entire crop within hours. Consider a backup propane heater or generator for critical operations.
- Water supply: If your growing room is in an outbuilding, ensure water lines are insulated and heat-traced to prevent freezing.
6. The Growing Cycle
Understanding the mushroom growing cycle is essential for planning production schedules, managing labour, and forecasting revenue. While specific timelines vary by species, the basic cycle follows the same pattern for all cultivated gourmet mushrooms.
Step 1: Inoculation
Inoculation is the process of mixing grain spawn into your prepared substrate. For supplemented sawdust blocks, the standard inoculation rate is 5–10% spawn by wet weight — meaning a 2.5 kg fruiting block receives 125–250 g of grain spawn. Higher spawn rates mean faster colonization and lower contamination risk, but increase your spawn costs.
Inoculation should be performed in the cleanest environment possible. Ideally, use a dedicated clean room or work in front of a laminar flow hood. At minimum, work in a still, draft-free area that has been thoroughly cleaned and disinfected. Wear clean clothes, tie back hair, and sanitize hands and tools with 70% isopropyl alcohol.
Step 2: Incubation
After inoculation, bags are sealed and placed in a warm (20–25°C), dark incubation space. During incubation, the mycelium grows outward from each grain kernel, gradually colonizing the entire block. This phase requires no humidity or fresh air — just stable warmth and darkness.
Incubation times vary by species:
| Species | Incubation Time | Incubation Temp | Signs of Full Colonization |
|---|---|---|---|
| Blue Oyster | 10–14 days | 21–24°C | Block fully white, firm to touch |
| Lion’s Mane | 14–21 days | 21–24°C | Dense white mycelium, block very firm |
| Shiitake | 30–60 days | 20–24°C | Block fully brown (“popcorning”), bumpy texture |
| King Oyster | 18–25 days | 21–24°C | Block fully white, very dense |
| Maitake | 30–45 days | 21–24°C | Block fully white with darkening areas |
During incubation, check blocks regularly for signs of contamination — green or black patches (Trichoderma), pink or orange discolouration, or sour/fermented smells. Remove any contaminated blocks immediately to prevent spread.
Step 3: Fruiting
Once fully colonized, blocks are moved to the fruiting room and exposed to the conditions that trigger mushroom formation: fresh air, humidity, light, and often a temperature drop. For most species, cut an X or slit in the bag to create a fruiting port, or remove the bag entirely.
Fruiting conditions for popular species:
| Species | Fruiting Temp | Humidity | CO₂ Tolerance | Days to Harvest |
|---|---|---|---|---|
| Blue Oyster | 10–18°C | 85–95% RH | <1,000 ppm | 5–7 days from pins |
| Lion’s Mane | 15–20°C | 90–95% RH | <800 ppm | 7–10 days from pins |
| Shiitake | 12–18°C | 80–90% RH | <1,500 ppm | 5–8 days from pins |
| King Oyster | 12–16°C | 85–95% RH | 1,000–2,000 ppm | 7–10 days from pins |
| Maitake | 15–20°C | 85–95% RH | <1,000 ppm | 10–14 days from pins |
Step 4: Harvest
Harvest timing is critical for quality and shelf life. Each species has specific indicators:
- Blue Oyster: Harvest when cap edges are still slightly curled downward. Once caps flatten and edges begin to wave upward, the mushrooms are past prime — they’ll have shorter shelf life and release spores heavily.
- Lion’s Mane: Harvest when spines (teeth) are 0.5–1 cm long and the fruiting body is still compact and firm. Over-mature lion’s mane turns yellowish and develops a bitter taste.
- Shiitake: Harvest when caps are 70–80% open (still slightly convex). The gills should be visible but the veil may still be partially intact for premium quality.
After first harvest, most species will produce a second flush (and sometimes third) from the same block. Rest blocks for 7–14 days between flushes, maintaining humidity but reducing fresh air. Second flushes typically yield 50–70% of first flush volume.
7. Contamination Prevention
Contamination is the single biggest challenge facing mushroom growers. Mould spores are everywhere — in the air, on surfaces, in substrates, on your clothes and skin. Success in commercial mushroom growing isn’t about eliminating contamination entirely (impossible) but about managing it to acceptable levels. A well-run commercial operation should have contamination rates below 5%.
Common Contaminants
Trichoderma (green mould) is the most common and most devastating contaminant. It appears as white patches that quickly turn bright green as it sporulates. Trichoderma grows faster than most mushroom mycelium, competes aggressively for nutrients, and produces anti-fungal compounds that actively kill mushroom mycelium. If you see green, that block is finished — remove and dispose of it immediately, far from your growing area.
Cobweb Mould (Dactylium or Hypomyces) appears as wispy, grey, cotton-candy-like growth that spreads rapidly over substrate surfaces and developing mushrooms. It thrives in high humidity and stagnant air. Caught early, it can sometimes be treated with a direct spray of 3% hydrogen peroxide, but prevention through proper air circulation is far better.
Bacterial Blotch appears as slimy, yellowish-brown spots on mushroom caps. It’s caused by Pseudomonas bacteria and is usually a sign of excessive humidity (>98% RH), poor air circulation, or water sitting on mushroom surfaces. Reduce humidity slightly, increase airflow, and avoid misting directly onto mushrooms.
Black Mould (Aspergillus or Stachybotrys) indicates serious problems — usually inadequate sterilization or a severely compromised growing environment. If you’re seeing black mould regularly, review your entire process from substrate preparation to room sanitation.
Prevention Best Practices
- Start with quality spawn: Clean, vigorous spawn from a reputable supplier like Boreal Genetics colonizes faster, leaving less opportunity for contaminants to establish.
- Nail your sterilization/pasteurization: Most contamination originates in the substrate. Verify your sterilization process with biological indicators (available from autoclave supply companies). For pasteurization, use a probe thermometer to confirm core temperatures.
- Work clean: Designate a clean area for inoculation. Clean and disinfect all surfaces with 10% bleach solution or commercial quaternary ammonium sanitizer before each session. Wear clean clothes, nitrile gloves, and consider a face mask.
- Filter your air: Install HEPA or high-MERV filters on all air intakes to your growing room. A HEPA filter removes 99.97% of particles at 0.3 microns — this includes virtually all mould spores. Replace filters according to manufacturer schedules.
- Positive pressure: The gold standard is maintaining slight positive pressure in your clean/inoculation area so that air flows outward when doors are opened, preventing unfiltered air from entering.
- Separate dirty and clean operations: Keep substrate preparation, spent block disposal, and growing room activities physically separated. Never walk from your composting area into your inoculation room.
- Monitor and act fast: Check blocks daily. Remove contaminated blocks immediately. One green block left in your fruiting room can release billions of Trichoderma spores, contaminating surrounding blocks.
- Regular deep cleaning: Between production cycles, empty and deep-clean your growing room with a bleach solution or commercial horticultural disinfectant. Clean walls, floors, shelving, humidifiers, and fan blades.
8. Harvesting & Post-Harvest Handling
The way you harvest, handle, and store your mushrooms has an enormous impact on quality, shelf life, and customer satisfaction. Premium mushrooms command premium prices — but only if they arrive at the customer in pristine condition.
Harvest Timing
Harvest in the morning when mushrooms are coolest and before the day’s growth spurt. Use a sharp knife or twist-and-pull technique depending on species. Cut cleanly at the base of the cluster — leaving stub material on the block can invite bacterial contamination.
Handle mushrooms as little as possible. Every touch point is a potential bruise. Wear clean nitrile gloves and place mushrooms directly into the container they’ll be sold in whenever possible — reducing handling steps reduces damage.
Packaging
Packaging should protect mushrooms physically while allowing some air exchange — mushrooms continue to respire after harvest and will deteriorate quickly in sealed containers. Common packaging options:
- Kraft paper bags: Excellent breathability, eco-friendly, low cost ($0.15–$0.30 each). Great for farmers’ markets. Available from Canadian packaging suppliers like Uline Canada.
- PET clamshells: Clear plastic containers (typically 150g, 225g, or 340g) that showcase the product. Standard for retail/grocery. Look for recyclable or compostable options to align with sustainability messaging. Cost: $0.25–$0.60 each.
- Waxed cardboard boxes: Professional look for restaurant and wholesale accounts. Available in 2 lb and 5 lb sizes. Cost: $0.50–$1.50 each.
Cold Chain Management
Get mushrooms cold as quickly as possible after harvest. Rapid cooling to 2–4°C dramatically extends shelf life. A dedicated mushroom fridge (or section of a walk-in cooler) should be maintained at 2–4°C with moderate humidity (80–85% RH). Most household refrigerators run drier than ideal — placing mushrooms in a paper bag inside the fridge helps.
Shelf life by species (at proper cold storage):
| Species | Shelf Life (2–4°C) | Notes |
|---|---|---|
| Blue Oyster | 7–10 days | Maintain airflow; tends to dry out in low humidity |
| Lion’s Mane | 7–14 days | Excellent keeper. Turns yellowish when past prime. |
| Shiitake | 10–14 days | Best shelf life of all gourmet species. Very durable. |
| King Oyster | 10–14 days | Dense flesh stores exceptionally well. |
| Maitake | 5–7 days | More perishable. Sell quickly or dehydrate. |
For deliveries, use insulated cooler bags or boxes with ice packs, especially in summer. Mushrooms should never be exposed to temperatures above 10°C for extended periods after harvest. If you’re delivering to restaurants or stores, invest in reusable insulated totes — they project professionalism and protect your product.
9. Scaling Up: From Hobby to Commercial
The transition from growing mushrooms as a hobby to running a commercial operation is one of the most exciting — and challenging — steps you’ll take. Scaling up requires more than just growing more mushrooms. It demands systems, consistency, business planning, and compliance with Canadian food safety regulations.
When Are You Ready?
Consider scaling up when you can consistently achieve:
- Contamination rates below 10% (ideally below 5%)
- Predictable yields from at least two species
- More demand than you can currently supply
- A clear understanding of your costs (spawn, substrate, utilities, labour, packaging)
- A business plan or at least a basic financial projection
Business Planning
A simple business plan for a small commercial mushroom operation should include:
- Production capacity: How many blocks per week? What species mix? What’s your expected yield per block?
- Revenue projections: Based on your species, yields, and local pricing. Be conservative — assume 70% of maximum yield to account for contamination, unsold product, and learning curve.
- Startup costs: Growing room build-out, equipment (autoclave, humidifier, HVAC, shelving, flow hood), initial spawn and substrate supplies.
- Operating costs: Spawn, substrate materials, packaging, utilities, insurance, vehicle costs for delivery, and labour (including your own time).
- Break-even analysis: At what production volume do your revenues cover costs? Most small operations break even at 25–50 lbs per week of mixed gourmet mushrooms.
Licensing and Regulations in Canada
Mushroom growing regulations in Canada vary by province and by how you sell your product:
Direct sales (farmers’ markets, farm gate, CSA): In most provinces, you can sell fresh whole mushrooms at farmers’ markets with minimal licensing. You’ll typically need a market vendor permit and may need to register as a food premises with your local health unit. Requirements vary — check with your provincial ministry of agriculture and local public health authority.
Retail and wholesale: Selling to grocery stores, restaurants, and distributors generally requires more formal food safety compliance. You may need a food handler’s certification, business insurance, and a documented food safety plan.
CFIA requirements: The Canadian Food Inspection Agency (CFIA) oversees food safety at the federal level. For fresh, whole mushrooms sold domestically, CFIA requirements are relatively straightforward. However, if you plan to export, sell processed/dried mushrooms, or make any health claims, CFIA oversight becomes more significant. Key considerations:
- Fresh mushrooms must be properly labelled with product name, net quantity, and origin.
- The Safe Food for Canadians Regulations (SFCR) may require a preventive control plan (PCP) if you’re engaged in interprovincial trade or export.
- Any value-added products (dried, powdered, pickled mushrooms) fall under processed food regulations and require additional licensing.
- Health/medicinal claims about mushrooms (e.g., “boosts immune function”) are regulated by Health Canada and require approved Natural Health Product numbers.
Provincial Highlights:
- Ontario: Check with your local public health unit for food premises requirements. The Ontario Ministry of Agriculture (OMAFRA) offers excellent resources for new mushroom growers.
- British Columbia: Contact your regional health authority for food premises permits. BC has a strong existing mushroom growing community with many resources available.
- Quebec: MAPAQ (Ministère de l’Agriculture, des Pêcheries et de l’Alimentation) oversees food safety. Labelling requirements include French-language compliance.
- Alberta: Alberta Health Services handles food safety permits. The Alberta Mushroom Growers’ Association is a valuable resource.
Insurance: Commercial general liability insurance is strongly recommended and often required by markets and retailers. Expect to pay $500–$1,500 CAD/year for a small operation. Farm-specific policies may offer better rates if mushroom growing is part of a diversified farm operation.
10. Marketing & Selling Your Mushrooms
Growing beautiful mushrooms is only half the business — you also need to sell them. The good news is that demand for locally grown, fresh gourmet mushrooms far exceeds supply in most Canadian markets. Here are the main sales channels, from easiest to most complex:
Farmers’ Markets
The best starting point for most new growers. Farmers’ markets let you sell directly to consumers at retail prices ($18–$35/lb depending on species), build a brand, get immediate customer feedback, and develop a following. Tips for market success:
- Invest in attractive signage and an eye-catching display — mushrooms are visually stunning and sell themselves when displayed well.
- Offer recipe cards and tasting samples (check your market’s rules on samples).
- Educate customers — most people have never seen a fresh lion’s mane. Your knowledge is a competitive advantage.
- Accept electronic payment (Square, Moneris, etc.) — many market shoppers carry little cash.
- Start at one market and add more as your production scales. Weekend markets in urban areas are typically the highest-volume.
Restaurants and Chefs
Chefs love local, fresh specialty mushrooms and will often become your most loyal customers. Approach restaurants during off-hours (Tuesday–Thursday, 2–4 PM) with samples. Offer consistent weekly delivery and competitive wholesale pricing ($10–$18/lb depending on species and volume). Building 8–12 steady restaurant accounts can absorb significant production and provide reliable weekly revenue.
Grocery and Retail
Independent health food stores, co-ops, and specialty grocers are often eager to carry local mushrooms. Larger chains (Sobeys, Metro, Loblaws) are more difficult to access but not impossible — many have local sourcing programs. Expect wholesale pricing ($8–$14/lb) and requirements for consistent supply, proper packaging, and possibly liability insurance.
Online and Direct-to-Consumer
A simple website or social media presence (Instagram is particularly effective for mushrooms — they’re photogenic) can drive direct sales. Offer weekly subscription boxes, CSA-style shares, or pre-orders for market pickup. Some growers have built successful businesses selling dried mushrooms and value-added products online through Shopify stores, reaching customers across Canada via Canada Post or courier.
CSA Boxes and Subscription Models
Partner with existing vegetable CSA farms to add mushrooms to their boxes (a great way to access their customer base with minimal marketing effort), or launch your own mushroom CSA. Weekly or bi-weekly mushroom boxes ($25–$40 per box) with a rotating selection of species build predictable revenue and reduce waste from unsold product.
Pricing Strategy
Know your costs and price accordingly. A common mistake is underpricing — specialty mushrooms are a premium product and should be priced as such. Research your local market, but general retail price ranges in Canadian markets (2024–2026) are:
| Species | Retail ($/lb) | Wholesale ($/lb) |
|---|---|---|
| Blue Oyster | $14–$22 | $8–$14 |
| Lion’s Mane | $22–$30 | $14–$20 |
| Shiitake | $18–$28 | $12–$18 |
| King Oyster | $18–$26 | $12–$16 |
| Maitake | $24–$35 | $16–$22 |
11. Getting Started with Boreal Genetics
Starting or scaling a commercial mushroom operation in Canada doesn’t have to be overwhelming. At Boreal Genetics, we’ve built our business around one mission: giving Canadian growers the best possible foundation for success. Here’s how we can help:
Premium Canadian Grain Spawn
Every strain in our catalogue has been selected specifically for performance in Canadian growing conditions. We don’t resell imported cultures — we maintain our own genetics library, perform rigorous quality testing on every batch, and produce all spawn fresh at our Canadian facility. Browse our full spawn catalogue to see our current strains, including our popular Snowflake Lion’s Mane, Dusk Blue Oyster, and Ember Shiitake.
Commercial Grower Program
Our commercial program is designed for growers producing at scale. Benefits include volume pricing, scheduled production runs so your spawn is always ready when you need it, priority support from our growing team, and access to exclusive commercial-only strains. Whether you’re producing 50 blocks per week or 500, we have a supply plan that fits.
Expert Support
We don’t just sell spawn — we help you succeed. Our team has hands-on experience with commercial mushroom production in the Canadian climate, and we’re always available to help troubleshoot growing challenges, optimize your process, or plan your next expansion. Growing mushrooms in Northern Ontario is different from growing in the Fraser Valley, and we understand those regional nuances.
Ready to start your commercial mushroom growing journey?
- 🍄 Browse our spawn catalogue — find the perfect strains for your operation
- 📦 Explore our commercial program — volume pricing and scheduled production
- 📞 Contact us — get a custom quote or talk to our growing team
Whether you’re inoculating your first bag of grain spawn or scaling to your hundredth grow room, Boreal Genetics is here to support Canadian mushroom growers every step of the way. Let’s grow something great together.
Free Growing Calculators
Use our free online tools to dial in your growing process:
- Substrate Moisture Calculator — calculate exact water and substrate amounts
- Spawn Rate Calculator — determine how much spawn you need per batch